Water Surf Photography 101
Written By : Dalton Johnson
Instagram : @Daltonjohnsonmedia
For those who wield a camera and desire warm beaches, tan lines, and endless waves it is inevitable you will seek out water photography. If you are a surfer playing with a camera on land, it’ll be a natural desire to take that camera into your playground. Regardless if you are a photographer hoping to snag epic barrel shots or a surfer dreaming of shooting the thing you love, this introduction will paint a picture of safely shooting surf from the water.
Water Safety
For those of you entering the water with a camera, safety needs to be at the forefront of your mind. There are several hazards and drowning is a real thing that we are going to avoid at all costs. Now, I could do a full post on water safety, however, the goal here is to give you an overview, so here is a list of the objective hazards, please do your homework to stay safe:-
Tides, rip currents, and hold-downs
-
Rocks and reef
-
Surfboards (learn your fin depths, these can slice you)
-
Your camera becomes a weapon if you let go
-
Your physical ability… remember you getting out and shooting is the first half
-
Your lung capacity… always work to improve this, I know I still am!
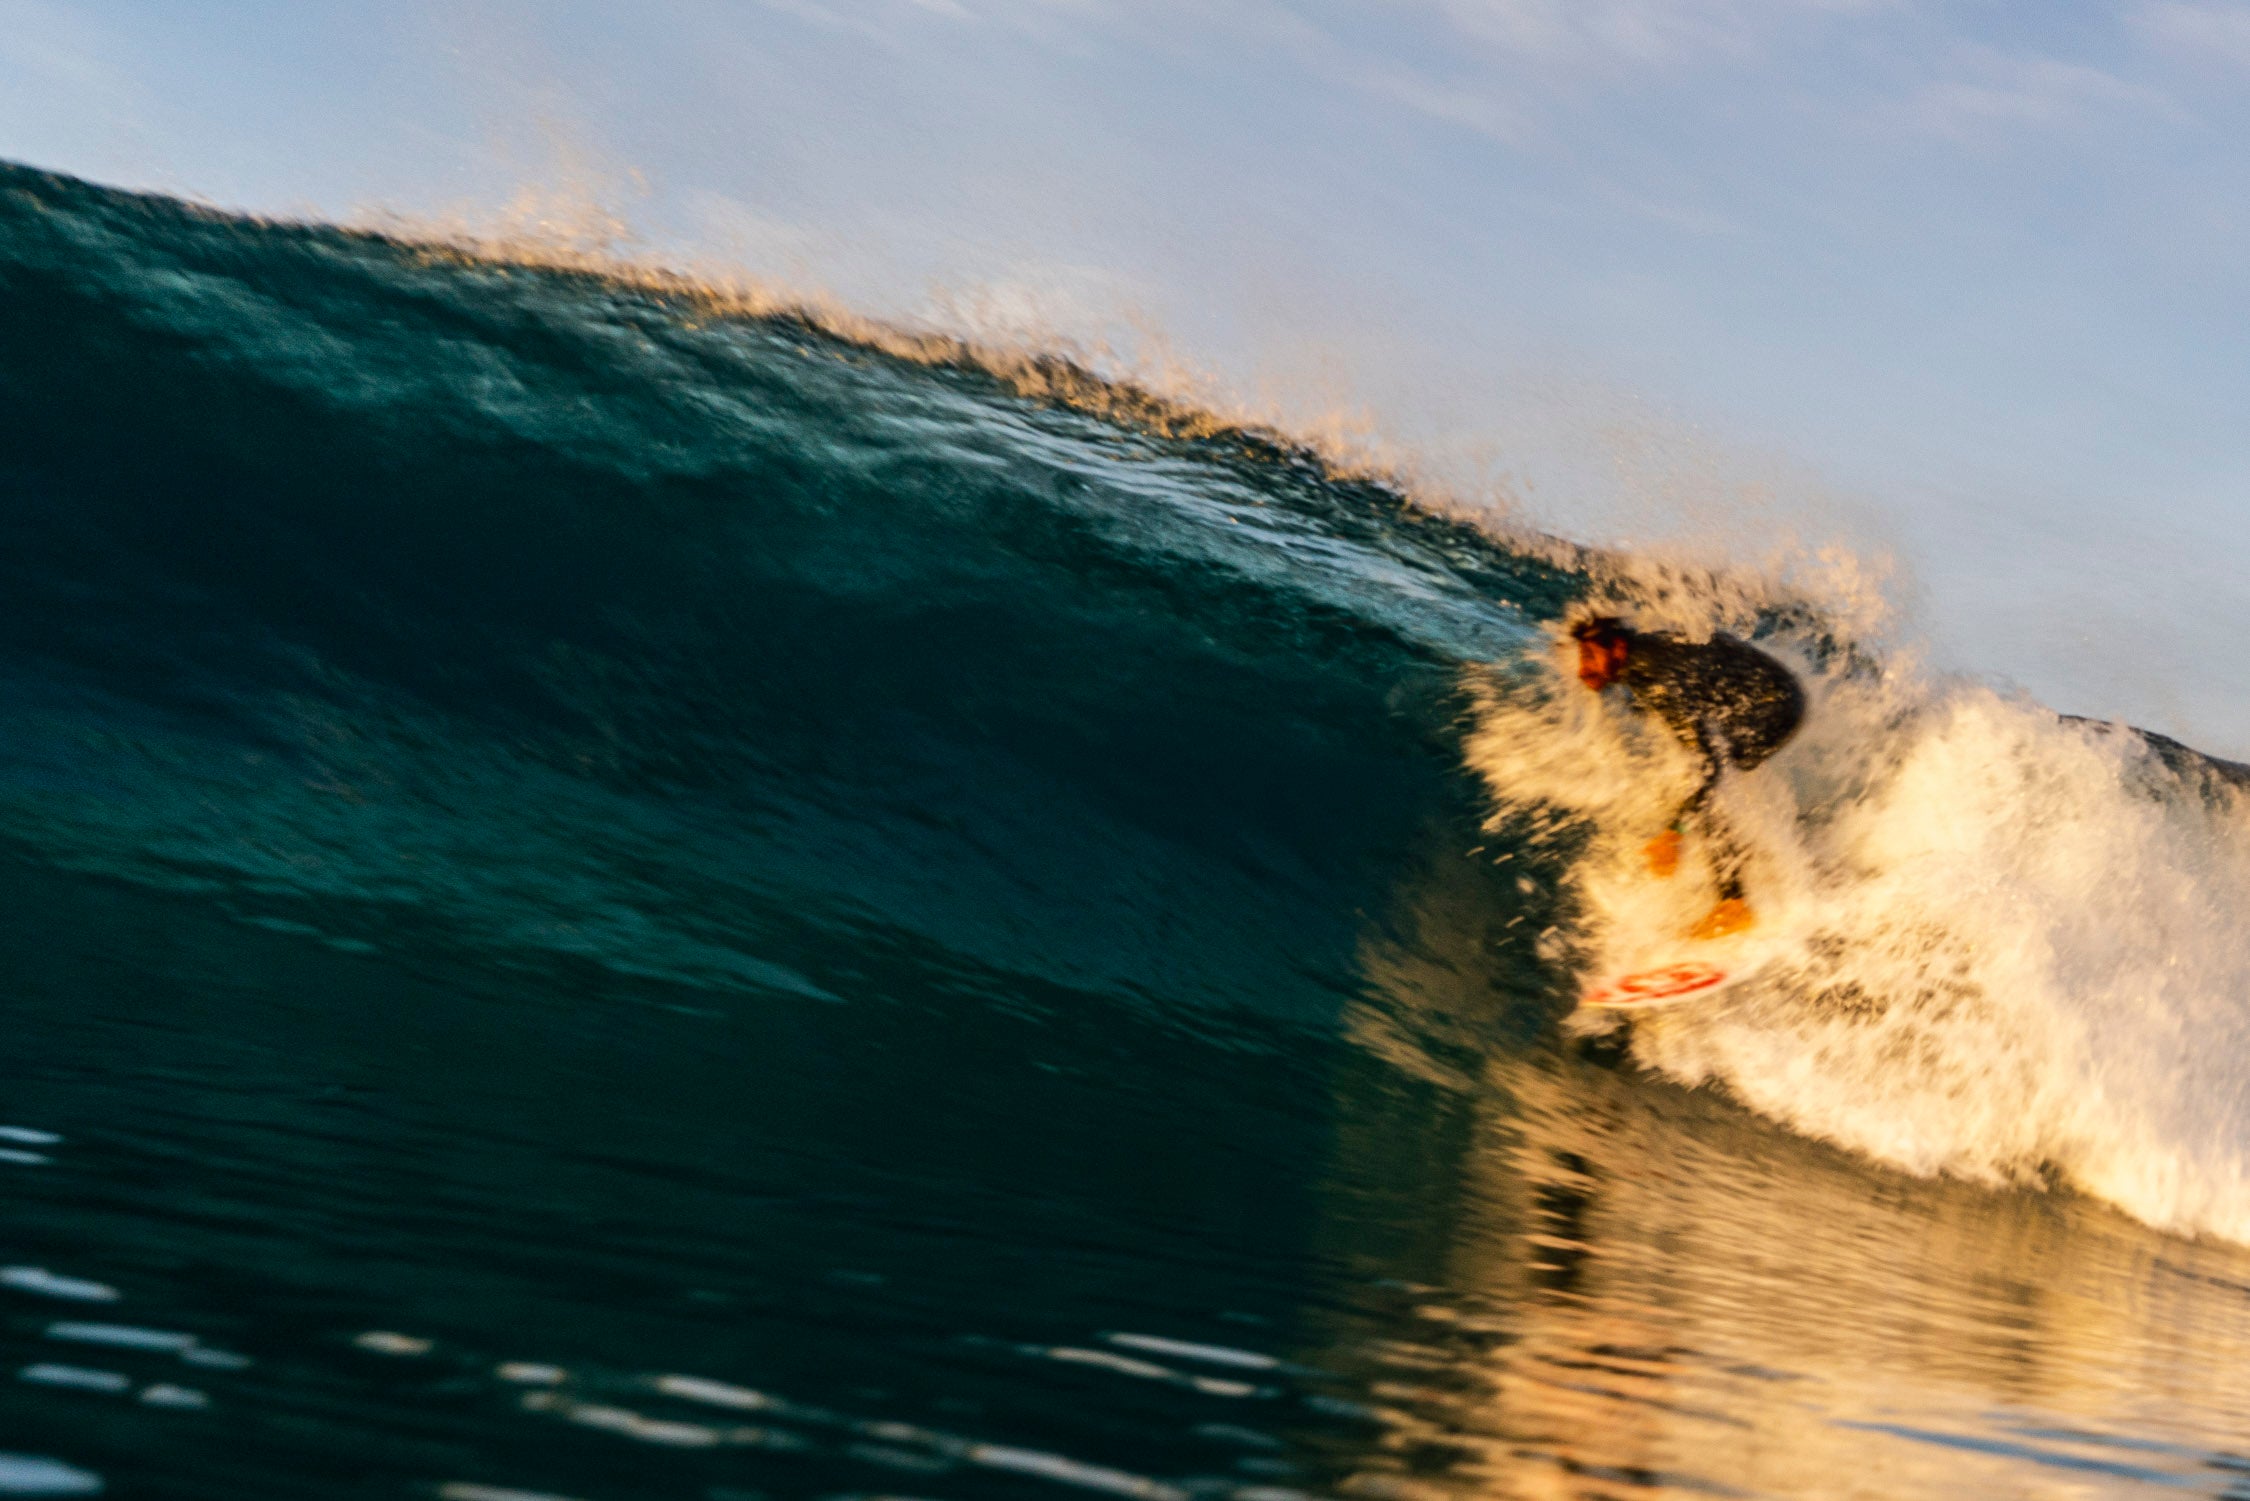
Types of Shots
The type of shots you can create are dictated by your gear. Now, that is not to say you can’t use your gear to create different images, because that simply is not true. So, below are three common lens length categories.
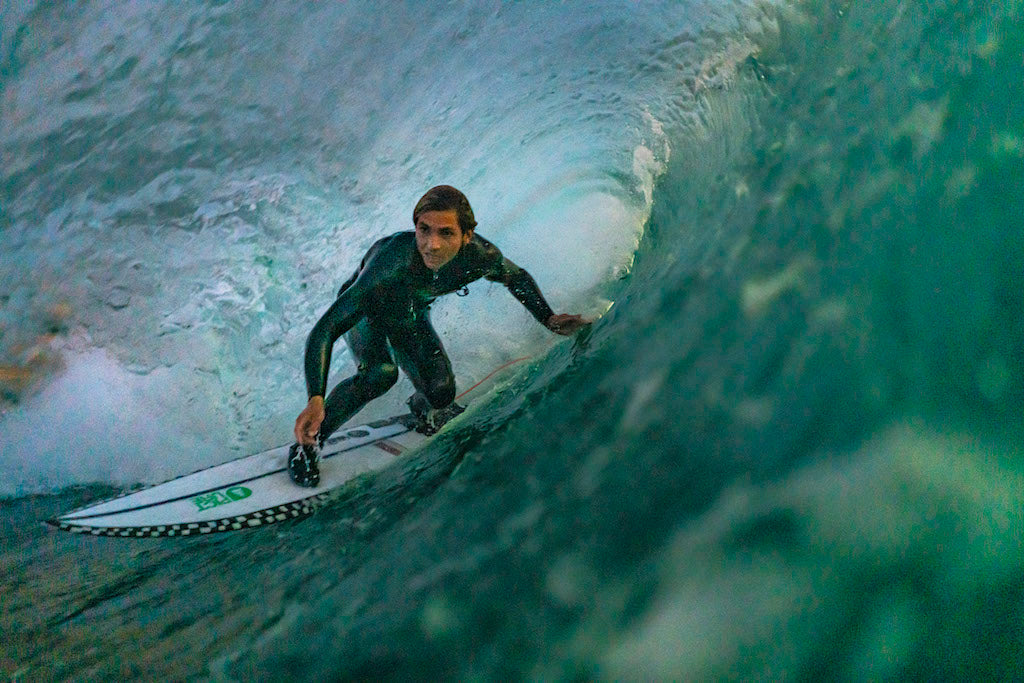
Wide (fish eye to 18mm):
Often used for joining the surfer in the barrel.
Standard (24-50):
These are great for an average day. If you are shooting longboarding, aerials, cutbacks, beginners, and more. Think of this range as your “jack of all trades” category.
Tight (70-200):
Often used for big wave surfing from a jet ski or details images.
Gear
Gear is the limiting factor while shooting in the water, so my goal is to show you the relationship between what you can shoot determined by gear (see above for examples). Also, I will give you the bare minimum, so you can get in the water with confidence.
Bare minimum:
-water housing
-fins
-camera
-wetsuit
-neoprene socks (this is not required but saves your feet from getting fin blisters)
Common prime lenses:
-fish eye or 16-18mm
-35 mm
-50 mm
-70-200 mm
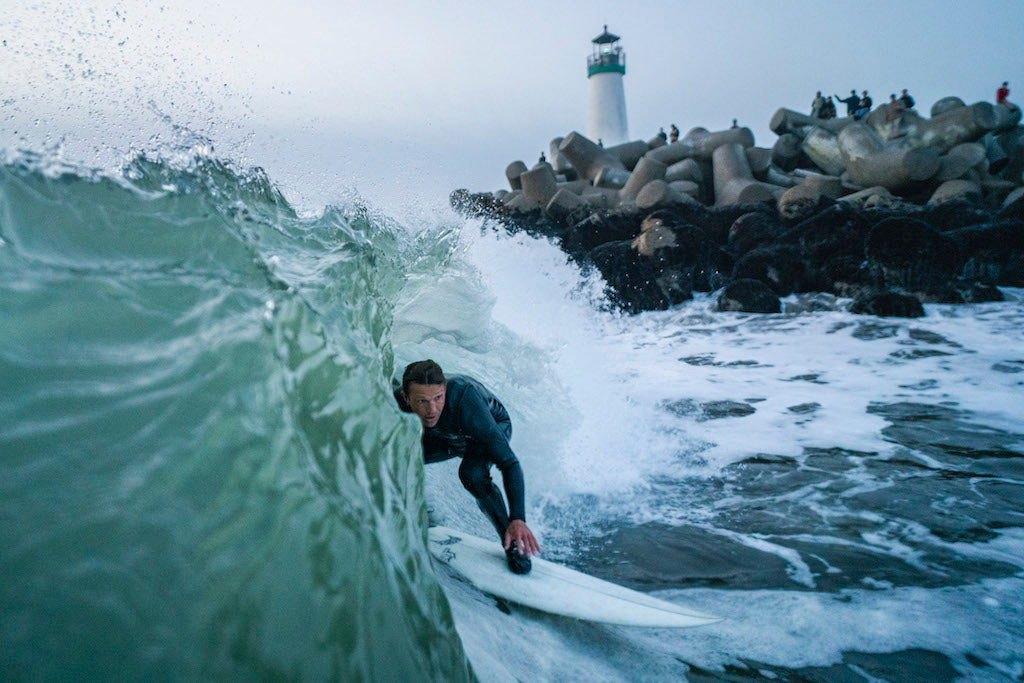
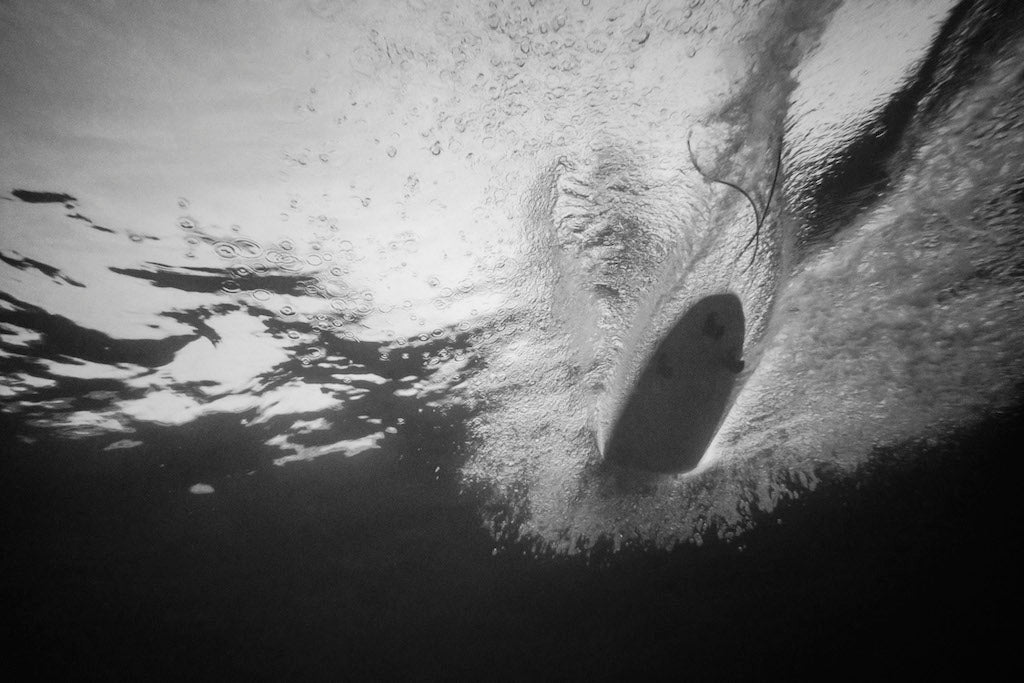
Positioning
The only wrong position is the one where you ruin the experiences of others. If you are in the way of a surfer, if you get hurt and others have to save you, or you are ruining the shot of another photographer are a few examples. In a perfect world, you should be kind out there, share, and create space for all! With that said, there are rules of thumb to create consistency in your work. Once you master these, break them and work through the creative process!
Rules of thumb:
-shoot at a 45-degree angle to the surfer on the wave
-rest the housing just atop of the surface (this helps stabilize the camera)
-stay on the shoulder of the wave, or in the impact zone, unless shooting barrels
-do you best to hold a single position by triangulating (triangulating is explained well in the movie, Chasing Mavericks, I recommend giving this wonderful film a watch)
-spit and lick your housing lens… I AM NOT JOKING HERE, there is a science to it about the bonding of saltwater to saliva and your lens!